


Tools and Apps for Journalists: iRig Recorder App
![]()
What is the iRig app?
These days, journalists with smart phones have a wide array of tools to use in their reporting. For those who need to record and send audio, the free iRig Recorder app for iOS and Android is worth checking out.
I had never heard of the iRig Recorder app until Austrian public broadcasting, ORF, called asking me to do a Q&A on post-election protests in Cambodia, where I’m based. “Sure,” I said, but pointed out that I didn’t have a land line (as relatively few in Cambodia do) and that the audio quality of a mobile phone interview might leave a little to be desired.
No problem, the producer said, pointing me to iRig Recorder, a nifty app that, while not perfect, offers pretty good sound quality, a simple interface, and lots of sharing options. The ORF producer and I could talk via Skype and I would use the app to record my answers and then send the audio to Vienna.
I downloaded the free version from iTunes (it’s also available for Android), and was initially a little worried seeing the middling reviews there. But the ORF producer seemed enthusiastic.
Easy to use
 The app has an intuitive interface. On opening it, you’ll see a screen with a large blue RECORD button near the bottom. One touch of that and you’re on. A large time display shows how much you’ve recorded and you can stop the action with the PAUSE button, then start up again where you left off. At the bottom on the screen, a waveform is generated as you record so you can make sure the sound is coming through. I thought the levels seemed pretty low, but found there was a way to boost things later.
When you’re done, touch RECORD again, and you’ll get a list of the recordings on the phone. The default name is the date and the time of the recording. But the app lets you give each recording a unique name if you want. Just tap the file to type.
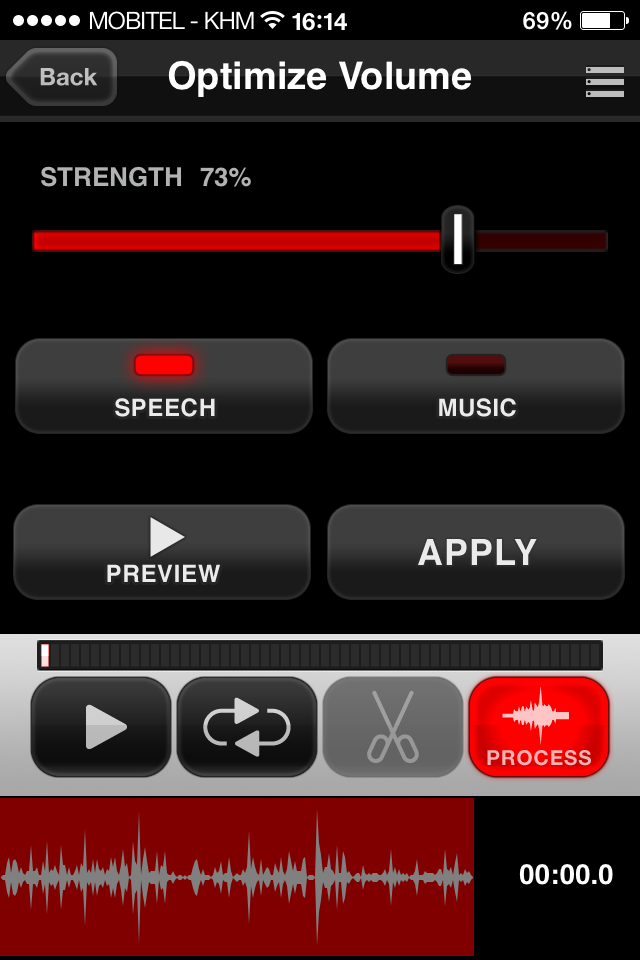 Then, hit the blue button next to the date and a processing screen opens up. On the free version, your options are limited to boosting your levels. But iRig allows you to determine what percentage you want to the increase the volume and whether you’re working with speech or music.
There are a bunch of optional processors available, such as tone optimization, cleaning up background noise, slowing the speed and changing pitch, among others. But the processing package costs $4.99. If you want to edit what you’ve recorded, you’ll also have to shell out a little cash. Trimming and making internal edits will set you back $4.99. Or, you can buy a package with all the added functions for $7.99.
I didn’t need any of that, since I was sending over my audio to the Austrians, and they edited out my stumbles at their end.
Sharing is simple
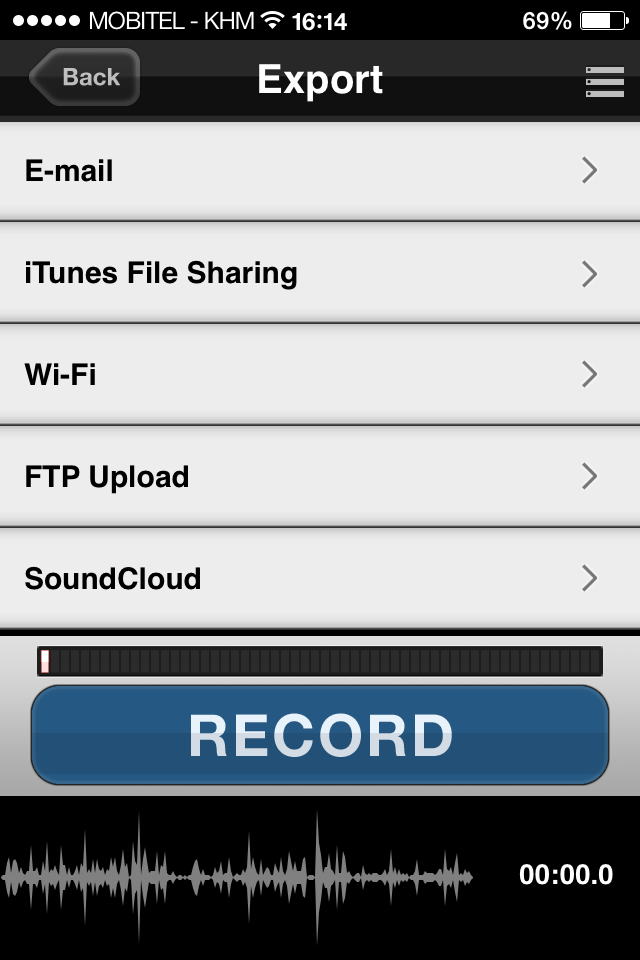
Once I’d finished my recording, I hit the EXPORT / SHARE symbol at the top of the file list screen. I could email the audio, use iTunes file sharing, share it on a local wi-fi network, FTP it, or upload it to SoundCloud. Most options gave me the choice of exporting high-quality (.wav file, 44.1 kHz), medium-quality (.m4a file, 96 kbps) or low-quality (.m4a file, 32 kbps) files. The email option limited me to an .m4a file.
 ORF had sent me their FTP settings beforehand, and my three-minute Q&A went over fairly quickly, despite my less-than-stellar internet speed.
As you might expect, the audio is not going to be exactly studio quality. You are using your smartphone’s mic, after all. But I found it acceptable, and of course so did Austria’s ORF.
The company behind iRig, IK Multimedia, makes a slew of accessories. The ones most interesting to journalists are the compact microphone that plugs into your phone’s audio jack and a larger handheld version. But they’ll cost you around $30 or $70 respectively.
The downsides
The iRig app is free, so you can’t expect perfection. Some complain that the paid add-ons are almost a necessity to get the quality and flexibility you might need. There is some truth to this. And without a high-quality mic, you’re audio is not going to be top notch, granted.
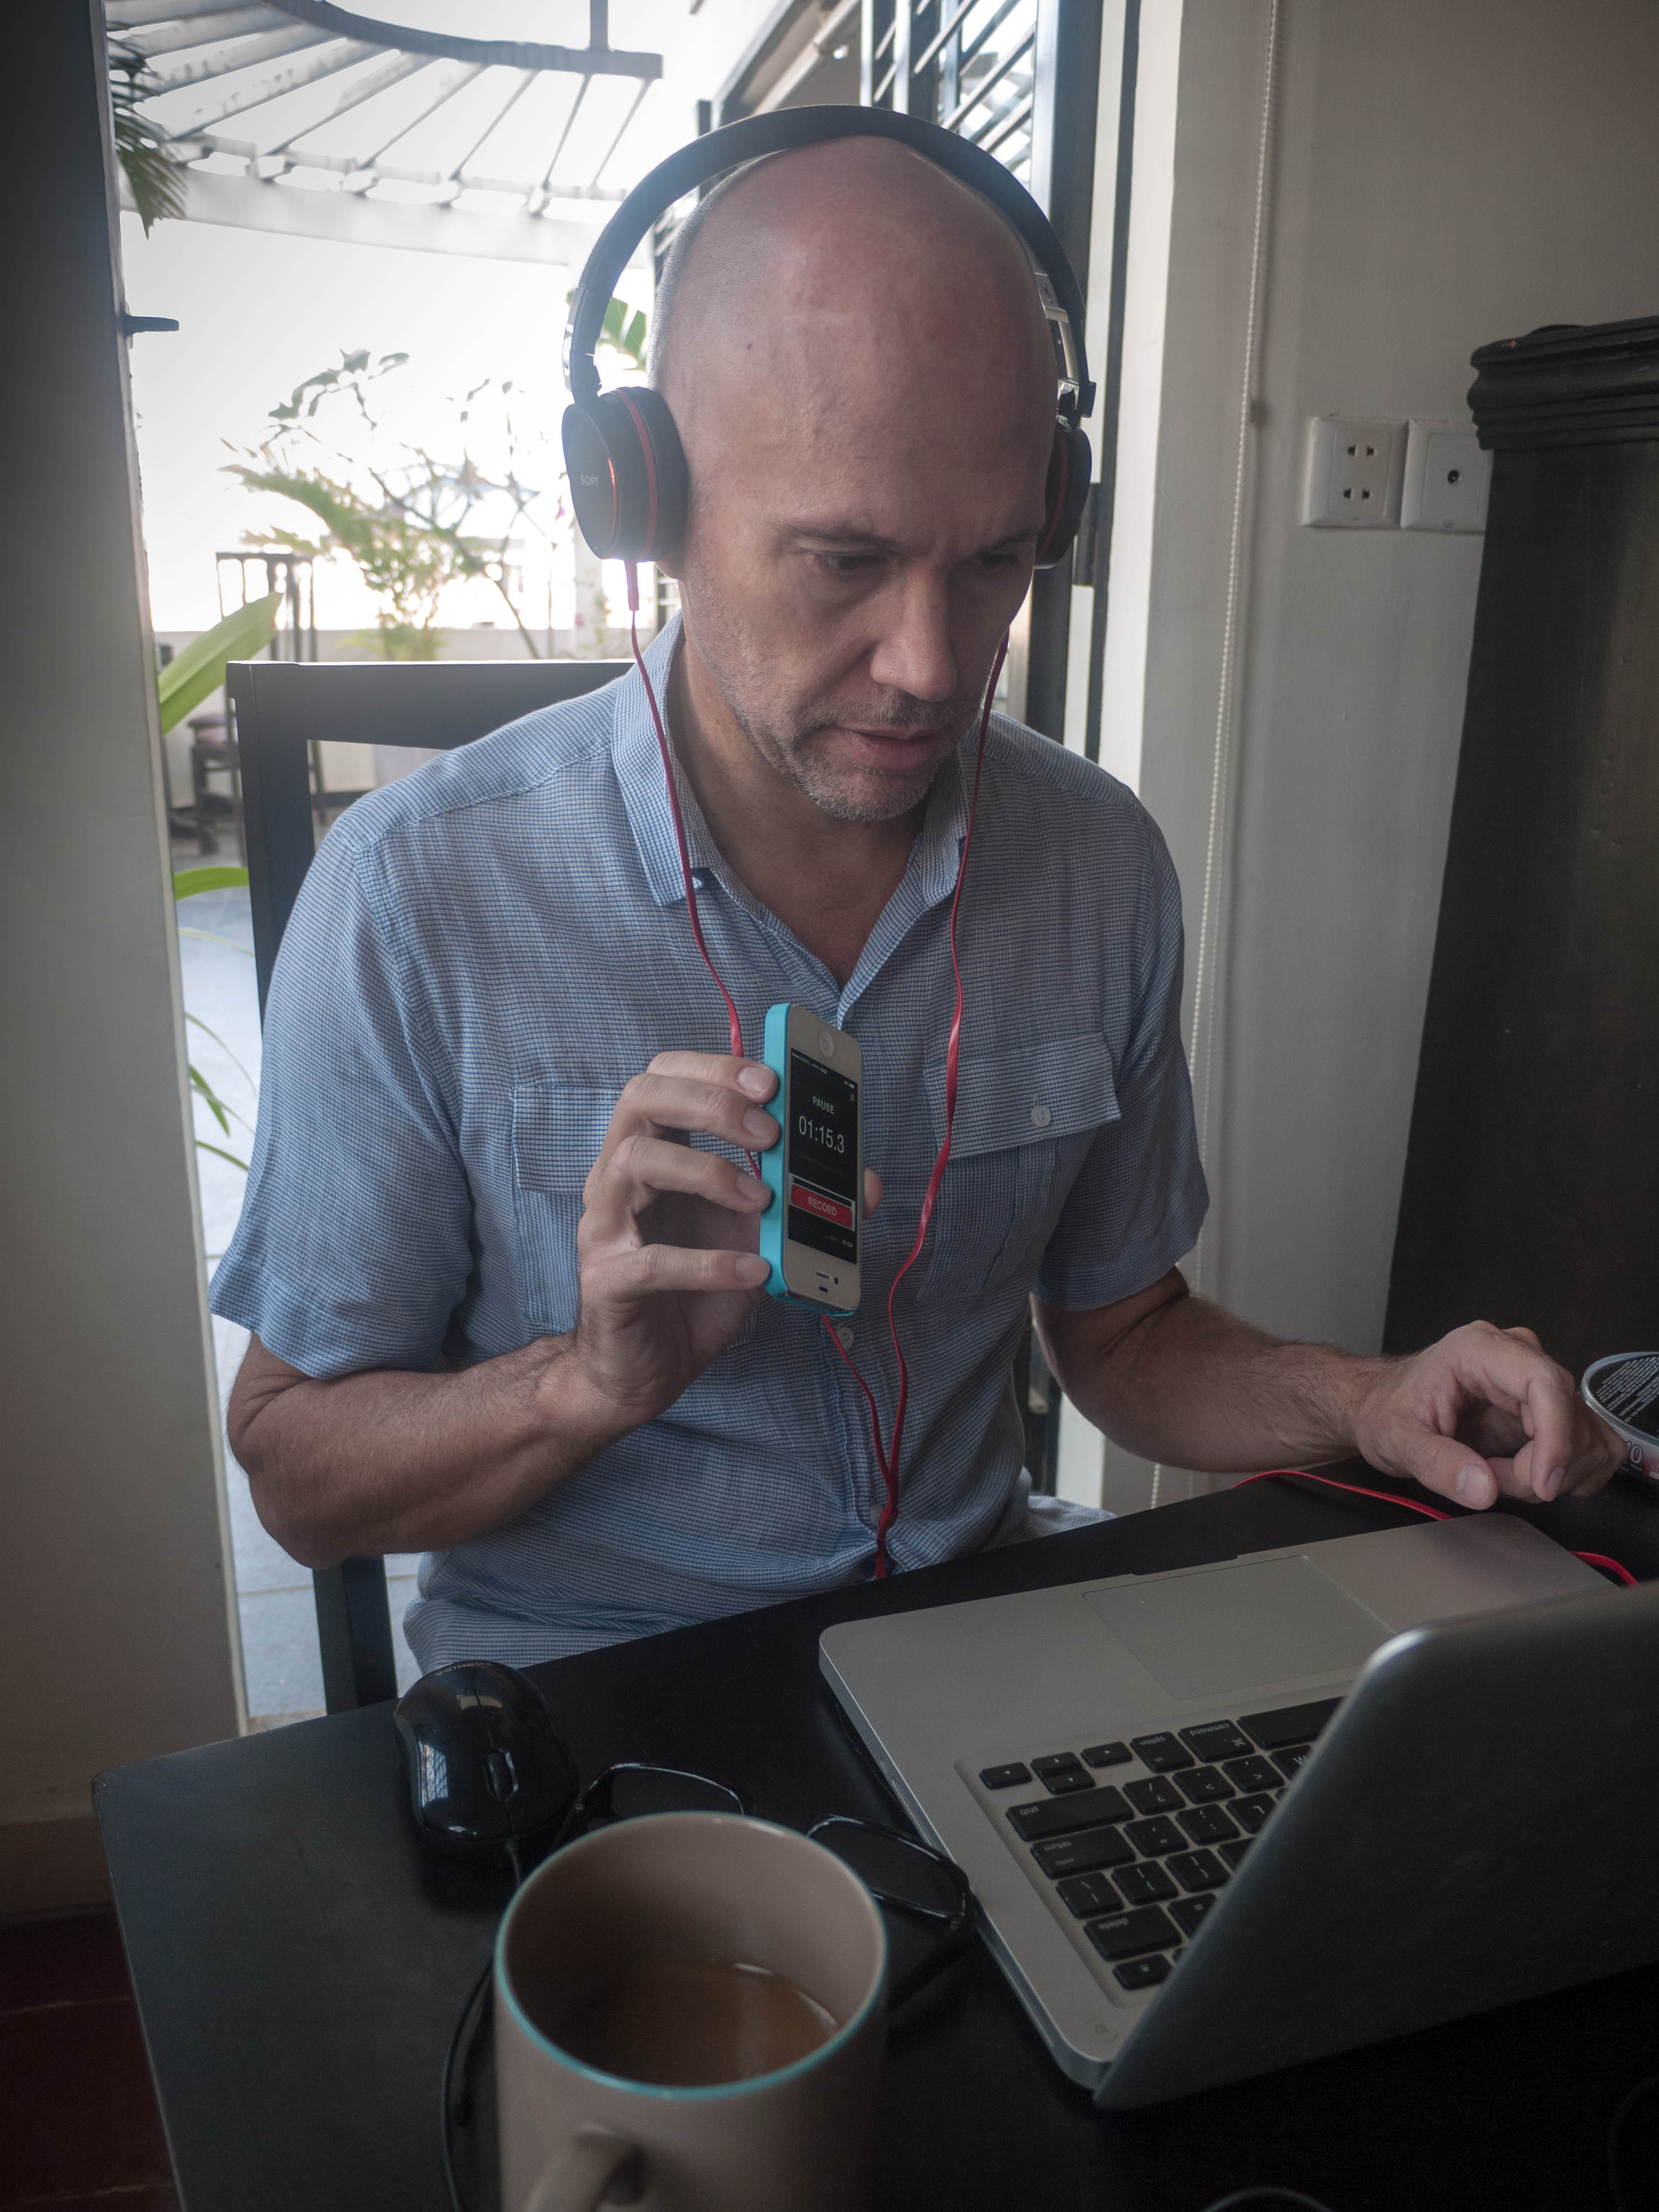
Using iRig to record my side of a Skype Q&A
Plus, you can’t take a phone call and then turn on iRig to record that conversation. As I mentioned, I Skyped with the station in Europe on my computer and recorded my side of the interview into my iPhone. So you’ll need to be able to work with that limitation.
I had forgotten to put my phone in Airplane mode when I started recording the Q&A with Vienna and got a phone call right in the middle of it, which put a quick end to things and crashed the app. Luckily, we had the time to do the interview again. Be sure to always engage Airplane / Offline mode before recording audio or video with any app.
But overall, for quick recordings, and especially Q&A’s with a studio that has more advanced audio editing equipment and can fix glitches and level problems, iRig is more than adequate. It’s simple to use and has a clean interface.
What else should journalists know about iRig?
Cost: Free, but the add-on packages for audio processing, editing and other features cost between $2.99 and $7.99.
Sharing: It’s easy. You can choose email, iTunes file sharing, local wi-fi, FTP, or upload your file to SoundCloud.
Support: IK Multimedia has an online FAQ and a support contact page.
Language: The interface is in English.
Author: Kyle James


![]()