Trainer recommendation: Mozilla Thimble
![]() If you’re looking for a simple way of introducing your online journalism trainees to the web’s Hyper Text Markup Language, better known by its acronym HTML, then consider the nifty little Mozilla Thimble editor – part of Mozilla’s suite of Webmaker tools.
If you’re looking for a simple way of introducing your online journalism trainees to the web’s Hyper Text Markup Language, better known by its acronym HTML, then consider the nifty little Mozilla Thimble editor – part of Mozilla’s suite of Webmaker tools.
HTML is the language used to build webpages and makes it possible to display information on the internet. These days most content management systems (CMS) allow us to create stories on blogs and websites without having to get our hands dirty with HTML. But even with a good CMS, what you see is not always what you get, so understanding some basic HTML is vital for journalists who are serious about improving their digital skills.
In most cases your participants have probably seen HTML at some point in their web surfing: whether by an accidental mouse click that revealed the source of a webpage, or in the options to share and embed media such as YouTube videos or SoundCloud audio tracks.
 To the untrained eye, trying to read HTML is like trying to read another language.
So the challenge for a journalism trainer is to introduce HTML in a way that doesn’t overwhelm your participants, but gives them enough knowledge to identify useful HTML terms, tags and elements so they can do some basic editing to their blog post or web article.
Pardon my French
Before we go any further, let me make a confession. My knowledge of HTML is about as good as my schoolboy French. In other words, I know enough HTML for day to day online work. For most journalists, just having some basic HTML knowledge is more than sufficient to adjust and customize text and media in webpages or troubleshoot some formatting in a blog post.
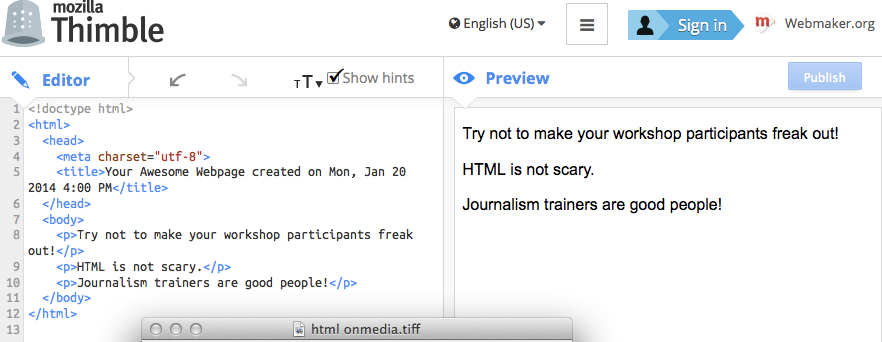
The beauty of Mozilla Thimble is it’s an easy to use editing platform for writing HTML and creating a webpage. Thimble lets you write and edit HTML and CSS in your browser, then instantly preview your work.
As you see in the screenshot below, you can write your HMTL text in the left hand side of the editor and see the preview results on the right hand side.
For many participants this is often a little “Aha!” moment and begins to demystify a technical language that is usually hidden to them.
Practical work
Before using Thimble in workshops, I suggest you prepare a few things to make sure training runs smoothly. For example:
– Checking that all workshop computers are running an up to date version of Mozilla Firefox, and/or all participants have the Firefox browser on their laptop or netbook.
– Open a common Mozilla Webmaker account if you are planning to do a lot of HTML exercises. This saves time because everyone can log in with the same account rather than opening individual accounts during training. You can, of course, use Thimble without having to log in, but you won’t be able to publish.
– Ask your participants to have a couple of extra tabs open in their browser with either a webpage or something with a media file embed code that you can copy and paste such as YouTube.
Once all participants have opened Mozilla Webmaker and found their way to Thimble within Tools, I keep it simple and ask everyone to press Start from Scratch which opens both the Thimble Editor and the Preview page opposite. And this is when it starts to get interesting for your trainees.
Start from Scratch opens with the example of a simple webpage with a line of text saying: “Make something amazing with the web”.
You can immediately point out the basic skeleton of a webpage in the Editor such as the Head, Title and Body. Make sure everyone has the Show hints box activated. By highlighting the text of individual tags with your mouse and clicking on the ? icon, Thimble’s Show hints function provides a definition and explanation of the selected element. That’s a really useful function for participants.
I also ask everyone to try changing the words within the Paragraph tags, or to copy and paste this line and to add more text. It’s very easy for them to see that text will be displayed between pairs of angle-bracketed Paragraph tags <p> and </p> and that this technique is applied to display different types of media as well.
Other useful HMTL tags to know are:
<br> Line break (essential!)
<b>Bold text</b>
<i>Italic text</i>
For more, check out this quick reference list of HMTL.
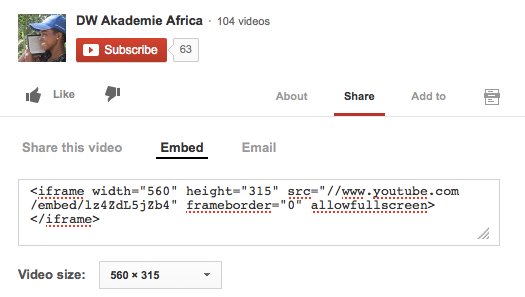
 Perhaps the most common use of HTML for your participants will be embedding the HTML text of an image, video or audio into a website or blog. If participants have another browser tab open with something easy they can embed, for instance from YouTube, ask them to copy and paste the embed text into the editor.
<iframe width=”560″ height=”315″ src=”//www.youtube.com/embed/lz4ZdL5jZb4″ frameborder=”0″ allowfullscreen></iframe>
It’s very easy to see what the video frame’s width and height attributes are, and when participants paste it into the editor they can experiment with adjusting the frame size.
Seeing the big HMTL picture
Once they get the idea of identifying and adjusting these basic tags and attributes of media, you could even ask participants to copy and paste the HTML text of a full webpage into the editor – just so they can see what it looks like and how they can make some edits.
I find our own onMedia Blog is a simple example to use in training.
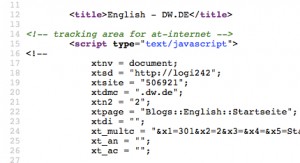
When everyone has the webpage open, I ask them to do a right mouse click and select View Page Source from the dropdown menu. Firefox will then open a new page revealing the HTML and CSS of the selected webpage. Ask your participants to select all, then copy and paste this text into the Thimble editor.
In Thimble your participants will now see both the HMTL and a preview of the copied webpage. I suggest they experiment (play!). For example, try changing the text within the blog’s Title Text ( in this case located on Line 135):
The great thing is they can directly see changes they make to the HTML text in the Preview. And by having a point of reference of something important in a webpage such as the Title, your trainees will be able to start looking around for other elements they can adjust, be it articles or captions or menus.
Mozilla Thimble is free to use and there are loads of resources on the Webmaker site for teaching web literacy skills.
Author: Guy Degen


